From House Plan to House Done: The Challenge and Thrill of Building Your Own Home
By Rexy Legaspi | Updated May 18, 2022
Nine Steps to the House of Your Dreams—From Scratch
The moment has finally arrived. Your dream home is about to become a reality. Are you ready for the ultimate challenge—and excitement—of building your own home?
As you prepare to make that giant leap, make sure that all of the pieces are in place and that every preliminary step has been completed, including finding land, filing for building permits, determining the budget/cost of building the home, arranging for financing/construction loans/insurance, locating materials suppliers, and choosing a plan design, contractor, and landscaper. Click here for more on some of these preliminary steps.
Building the home itself can take as little as three months or from eight months to a year—including the time spent on inspections after each construction phase. Looking for an ideal property can take longer. Take Laura and Ric, who wanted a bigger space and were willing to spend the time searching for a lot that could accommodate all of their specifications. It took them two years to find that perfect piece of land in a new suburban housing community.
Builder Search
In most cases, once a couple or family finds a building lot that they love, they start searching for a builder. Most people “shop” builders, usually talking to three companies, getting bids, and then choosing the best and most appropriate for their needs. Unlike other families, Laura and Ric spoke to just one builder—at the recommendation of a friend. They took a tour of the builder’s model homes to see his finished work and were attracted to one particular design, a two-story traditional house plan with a covered porch and deck. They discussed floor plans with the builder and their ideas of customizing everything before going off to find their "dream home" house plans.
Because their property was fairly extensive, they wanted a landscaped courtyard entry, complete with low shrubs and flowers, and a sizable vegetable garden at the back of the lot. They decided they could do with a small front porch but chose to have a huge sundeck for outdoor parties and family get-togethers. They talked over adjustments to their ideal first floor, which the builder agreed with. And it was on to the next step.
Remember, it makes sense to choose a builder who’s an expert on your type of property—be it a flat lot in a community where the infrastructure is set, a wooded area that has to be cleared, or a sloped lot ideal for a walkout basement.

This attractive two-story Craftsman style house plan with three bedrooms, a covered porch, courtyard entry, and a patio comes close to the home that a particular couple built several years ago. (Plan 189-1066)
Plan Search/Purchase
You can spend a lot of time studying and reviewing many house plans—and even walk through some model homes—and still not find what you’re looking for in a single design. The important thing is to visualize what you really want in your home and find a flexible and willing builder willing to consider your ideas. Then discuss modifications and their feasibility with the builder. All things considered, it’s easier to purchase a finished plan that mirrors most of what you want in your home—and then modify the design according to your vision of a dream home.
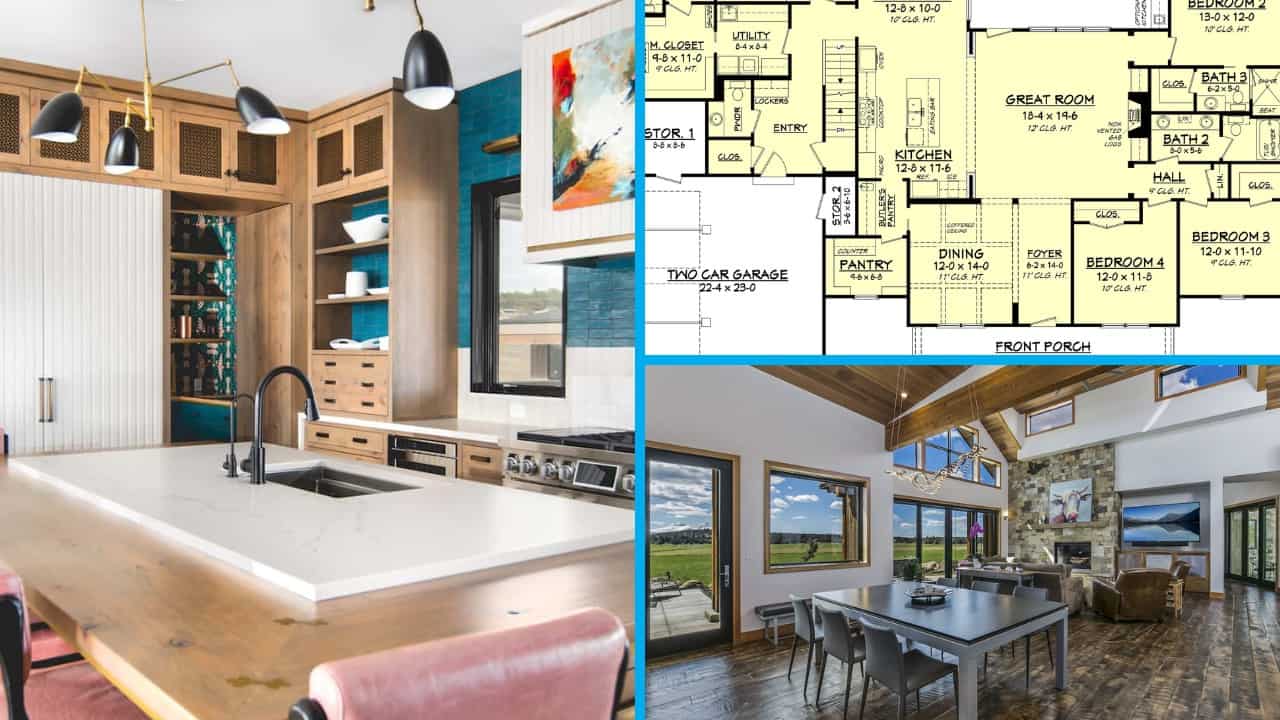
Laura had specific ideas about the exterior facade. Instead of a three-car garage on the right side, she wanted a two-car one on the left—she actually reversed the plan of a design that she and Ric liked. They opened up a huge coat closet on the first floor and converted it into a cozy guest room. Then, they added a half-bath/shower adjacent to the room. The master bedroom on the second floor was built on the east side of the house to get plenty of sunlight.
For this family, building the custom home took three months to complete. For others, the process may span five to eight months or even a year.

The first-floor layout of this one-story can be easily modified to fit a home owner’s specifications. For example, some couples may want a larger kitchen and extend the kitchen/dining area toward the rear where the porch is currently. (Plan # 142-1009)
Site Work
Once you have the property, a plan, and a builder, construction on the house begins. Most of the time, the building crew prepares the property to lay the foundation. The site is leveled; debris, rocks, and trees are cleaned out. This step may take anywhere from one to three days, depending on the kind of land on which the home is to be built. Lots on flat ground with no wooded areas and huge trees to be taken down are easier to level.

(Photo credit: Brian T for The Plan Collection)
Foundation
Perhaps the most important part of the home is its foundation because the entire structure rests on it. Remember the story of the “Three Little Pigs?” Not that anyone will build a house of straw or sticks. But make sure the foundation is rock solid, stays dry and free of cracks, and is constructed properly with all the safety measures in place. For a poured-concrete foundation, concrete can be poured into each wall section (or onto the floor in the case of a slab foundation) as soon as the foundation is dug and the forms are set. This step — including the time for the concrete to set and dry — may take from one to two weeks. A concrete-block foundation (basement or crawl space) may take a few days to a week or more to dig and build.
Quick tip: Make sure all foundation walls are high enough to protect the home from soil moisture.

(Photo credit: Brian T for The Plan Collection)
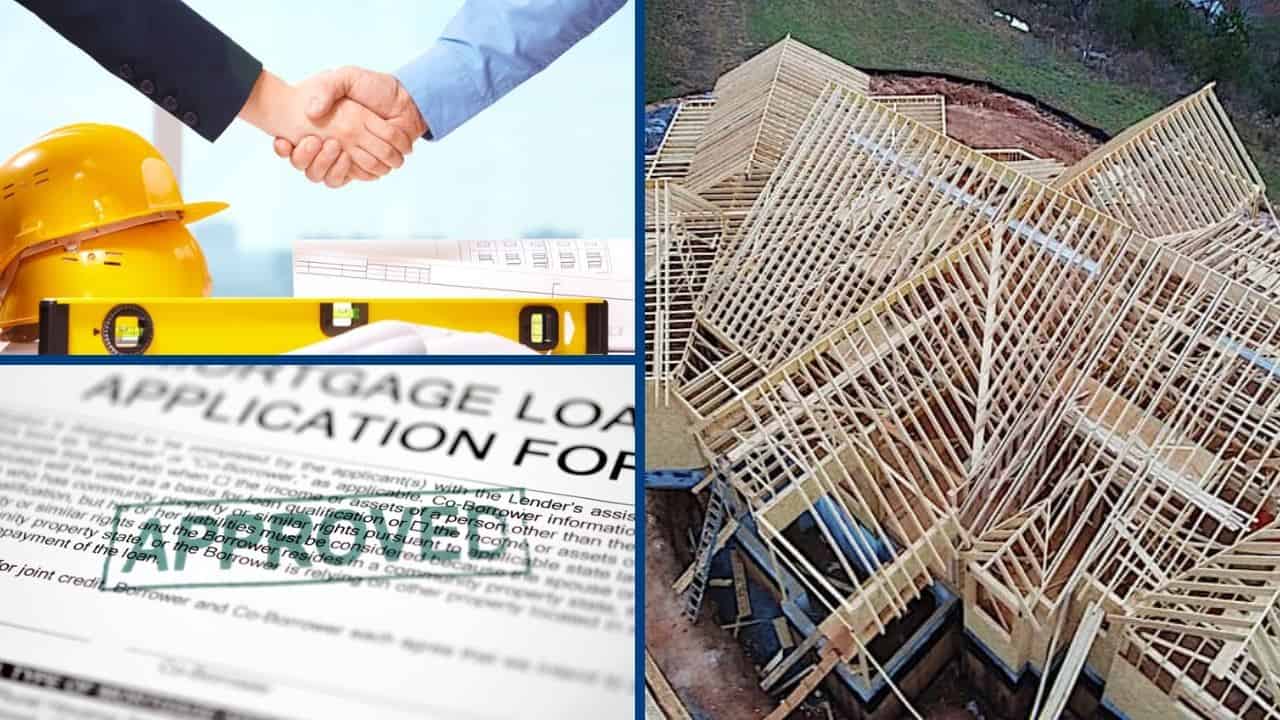
Framing
Once the concrete is set and completely dry, framing can start. This is perhaps one of the most exciting phases of house building — as the home begins to take shape. It is like unrolling a canvas and pieces of a picture begin to appear and become more distinct. There is the master suite, kitchen, living area, and the other spaces in your home. Now is the time to review your house plan/layout one more time—and check that everything is ready to be framed according to the plan design. An inspection comes after the initial framing work is done to ensure every step has been executed properly. When the floor, walls, and roof are framed, the roof sheathing is applied and then a protective barrier known as a house wrap is installed to prevent the structure and its interior from getting wet. The house wrap ensures that all moisture will remain outside the home.
If all goes well with the weather (and there are no unforeseen events), framing should be completed in about a month’s time.

Closing In/Weatherproofing
The framing has to pass inspection before your builder can begin enclosing the home. If the inspection goes well, you are ready to install protective sheathing, roof systems, windows, and doors—both exterior and interior. Your windows and doors are some of the more visible features of the home, so go with durability and energy efficiency as well as appeal and beauty.
As you install windows and doors, this is also the time to weatherproof your home—and avoid leaks around windows and doors. That is why the house wrap is used when the framing is completed. If your home is not properly sealed, you can expect warm air to escape during the winter and cool air to be displaced by warmer air in the summer through windows, doors, and other areas — the result: higher utility bills and a lot of discomfort. The best way to avoid this is to install weatherstripping and insulate your walls, floors, and ceiling properly.
Today’s new homes use insulation in all exterior walls, the attic, and the basement or crawl space. You can choose from a variety of insulation materials for your new home—fiberglass, cellulose and foam, foam board, and rock-wool blanket insulation. Plan on three to four days for insulation to be completed—and another inspection.
Wiring, Plumbing, Heating/AC
Once the frame—or skeleton—of the home is finished, your builder and his crew can start work on siding and roofing as well as wiring and plumbing. Expect to see wires, pipes, sewer lines, and vents running through the floor, walls, and ceilings as water heaters and the HVAC system is installed.
With the home still basically empty, except for the wires running through the walls, this is an excellent time to "rough out" bathroom fixtures such as bathtubs and shower units, leaving stubs of pipe where the fixtures water supplies and drain lines will be.
Another inspection comes after the roof is up and the house framed and “sheathed.” Breathe a sigh of relief when that inspection is over. Now you can start taping sheetrock or wall boards to the home’s interior before painting. Watch as the drywall is applied and the exterior bricks, stone, and siding are installed. Your home is finally looking like its original design!


Rough Finish
When work on the exterior facade, driveways, and doors is completed, you can install interior doors, cabinets, moldings, shelves, countertops, bathroom fixtures, shower doors, mirrors, interior trim, tiles, flooring, carpets.
Once all the interior trim and installation are finished, your home is ready for painting. Estimate about six to eight weeks for the drywall application, the exterior work, the interior touches, the painting, and clean up.
You are almost at the finish line. Just a matter of landscaping to be completed—and then a final inspection and walk-through of your home with your builder to be certain everything is working.
Finish
Finally! After three months, or eight months, or even a year, your dream home is ready!


Like many undertakings, building your own home can be a challenge—as well as an exciting and thrilling adventure! Are you prepared to take that giant step?
Home Design & Floor Plans
Home Building

Architectural Styles/Architecture